A small kitchen island isn’t just a luxury, it’s a smart solution for homeowners working with limited square footage. Whether you’re squeezing one into a galley kitchen or anchoring an open floor plan, a well-designed island boosts functionality, adds counter space, and creates a natural gathering point. The trick is choosing the right size, layout, and style for your specific kitchen footprint. This guide walks you through practical strategies to maximize your compact space without creating a traffic jam or choking off your work triangle. Let’s build something that actually works.
Table of Contents
ToggleKey Takeaways
- A small kitchen island design solves the dual problem of limited counter space and storage in compact kitchens while supporting the work triangle and natural traffic flow.
- Choose the right dimensions (24″ to 36″ wide) and layout strategy for your kitchen type—galley, one-wall, L-shaped, or corridor—using painter’s tape to mock up placement before committing.
- Maximize island functionality with three-sided storage: dedicate two sides to drawers and cabinets, reserve one side for seating with knee space and a 12″ to 15″ overhang.
- Light and neutral finishes (white, light gray, or natural wood) work best in small kitchens, while durable, low-maintenance tops like quartz or quality laminate balance style with practicality.
- Plan for electrical and plumbing needs early, invest in soft-close hardware for a professional feel, and always measure twice before building to avoid costly mistakes in tight spaces.
- Test fit seating, appliance access, and drawer operation before final installation, and don’t hesitate to hire licensed professionals for electrical, plumbing, or complex finishing work.
Why a Small Kitchen Island Works for Compact Spaces
A small island solves a real problem: most compact kitchens have minimal countertop real estate and scattered storage. An island consolidates both. Unlike a full-width peninsula that eats floor space, a properly sized island (think 24″ to 36″ wide by 4″ to 6″ deep) tucks into tight layouts without forcing you to shimmy sideways between cabinets and appliances.
The kitchen work triangle, the imaginary line connecting your sink, stove, and fridge, remains the foundation of kitchen function. A well-placed island supports this triangle by adding prep space at its heart. You’re not backtracking to the perimeter for every task: the island becomes your primary workspace.
Small islands also solve the storage gap. Most compact kitchens skip pantries. Add drawers, shelves, or open cubbies to your island, and suddenly you’ve got homes for baking sheets, cookbooks, or small appliances. Seating on one side transforms it into a casual dining or assignments spot, eliminating the need for a separate table in a tight living-dining area.
Psychologically, an island creates definition in an open floor plan. It anchors the kitchen visually and functionally, making even a 150-square-foot space feel intentional and designed rather than cramped.
Layout Strategies for Different Kitchen Sizes
Galley Kitchens and One-Wall Designs
Galley kitchens, those narrow, parallel-counter setups common in apartments and smaller homes, are tricky. A traditional island blocks the main traffic lane. Instead, consider a mobile or semi-permanent island on a sturdy cart or dolly, roughly 24″ × 36″. It tucks against one wall when not in use and rolls out for meal prep. Stainless-steel restaurant-grade carts work surprisingly well and cost less than built-in cabinetry.
Alternatively, a narrow drop-leaf or butcher-block top mounted to the short end of the galley (perpendicular to the long axis) creates prep space without blocking the corridor. Think of it as an L-shaped appendage rather than a true island. This approach gains you maybe 10 to 15 square feet of work surface while keeping foot traffic flowing.
One-wall kitchens offer a bit more flexibility. If your sink, stove, and fridge sit on a single 12- to 14-foot wall, a modest rectangular island (24″ × 48″) positioned roughly 4 feet from that wall maintains clearance (typically 36″ to 42″ minimum) for comfortable passage. This distance also keeps your work triangle compact and functional, according to resources like small kitchen solutions from The Kitchn.
L-Shaped and Corridor Layouts
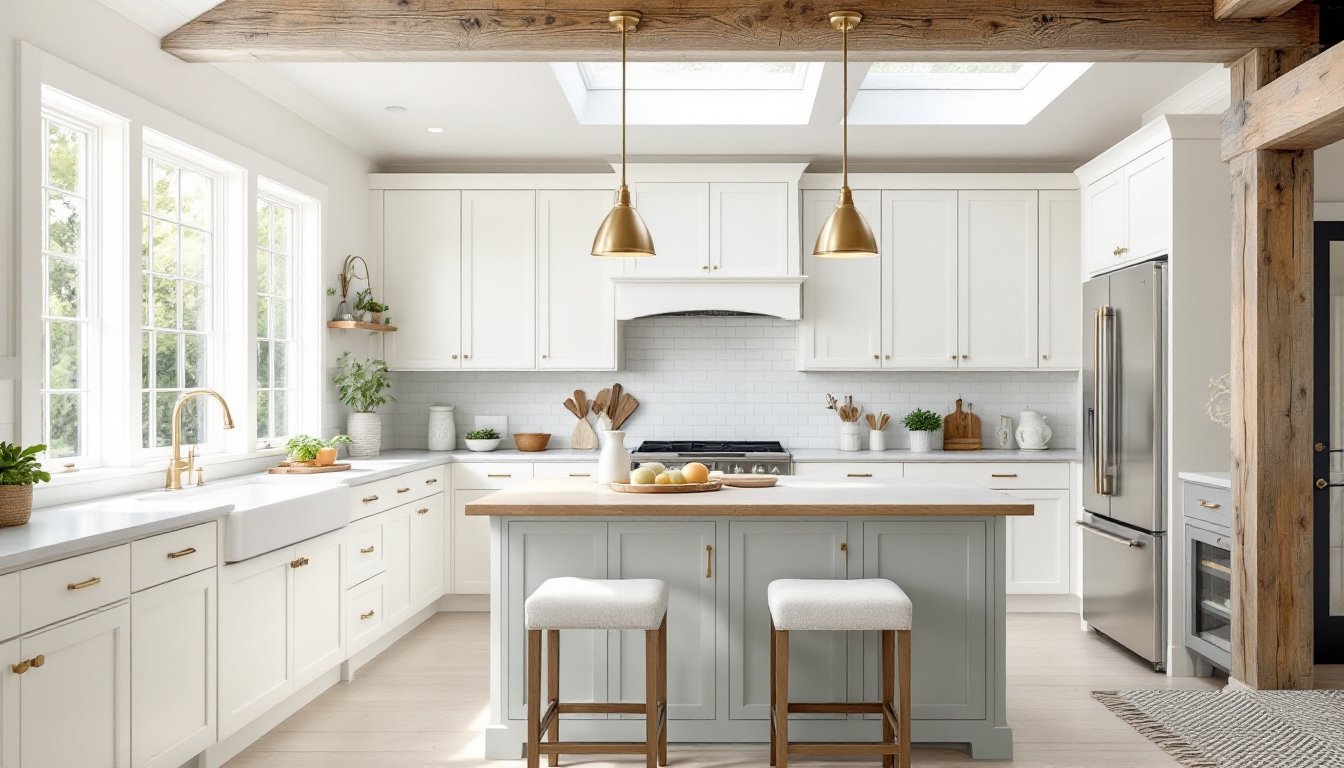
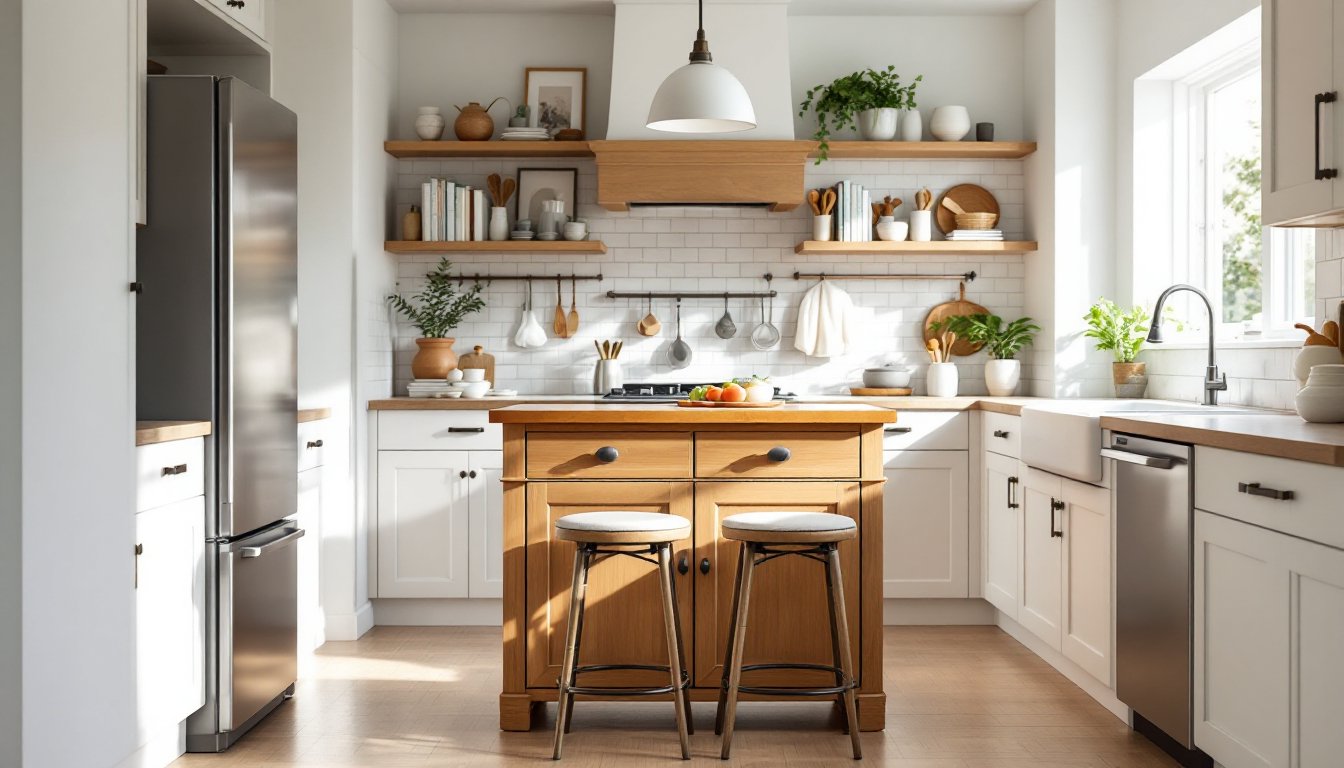
L-shaped kitchens offer the most island-friendly footprint. The two perpendicular counters create a natural “nook” for a 36″ × 48″ island in the corner of the L. This positioning keeps traffic flowing along the outer edge while the island anchors the inner work zone.
Corridor kitchens (two parallel walls with an opening at one end) can accommodate an island running perpendicular to the main walls, similar to a one-wall approach. The key is ensuring at least 36″ of clearance on all sides for comfortable passage and appliance doors to swing open fully. Measure twice. Seriously, cramming an island into a tight corridor creates misery, not functionality.
In all layouts, avoid blocking major appliances. Never place an island between your fridge and the stove or between a main entry and those appliances. Use a tape measure to mock up your island’s footprint on the floor with painter’s tape before you commit to a design. Walk through your typical kitchen tasks. If you feel squeezed, the island is too big for your space.
Smart Storage Solutions to Maximize Functionality
Storage makes an island worth building. A featureless slab of countertop takes up floor space without adding value. Load it with drawers, shelves, and cubbies that serve your actual cooking and living needs.
Drawer storage is the workhorse. Dedicate 18″ to 24″ of drawer depth to utensils, knives, measuring spoons, and gadgets. A deep drawer (10″ to 12″) near the cooktop holds pans and pot lids within arm’s reach. Use dividers and roll-out organizers to keep drawers from becoming black holes.
Open shelving works well for cookbooks, serving pieces, or decorative items visible from the dining side. Two 24″-wide shelves cost less than cabinetry and visually lighten a compact space. Just keep items edit ruthlessly: clutter on open shelves reads chaotic in a small kitchen.
Closed cabinets hide less-pretty necessities: small appliances, bulk pantry items, or cleaning supplies. A single 24″-wide cabinet base with a door and one shelf adds legitimate storage without visual clutter. Small appliance garages (a recessed shelf with a fold-down door) are worth the extra carpentry if you use a toaster, coffee maker, or air fryer daily.
Underslung racks and hooks extend functionality downward. Mount a sturdy rod with S-hooks below an overhang to hang measuring cups, kitchen towels, or lightweight cookware. This costs under $20 and adds 8 to 10 hanging slots.
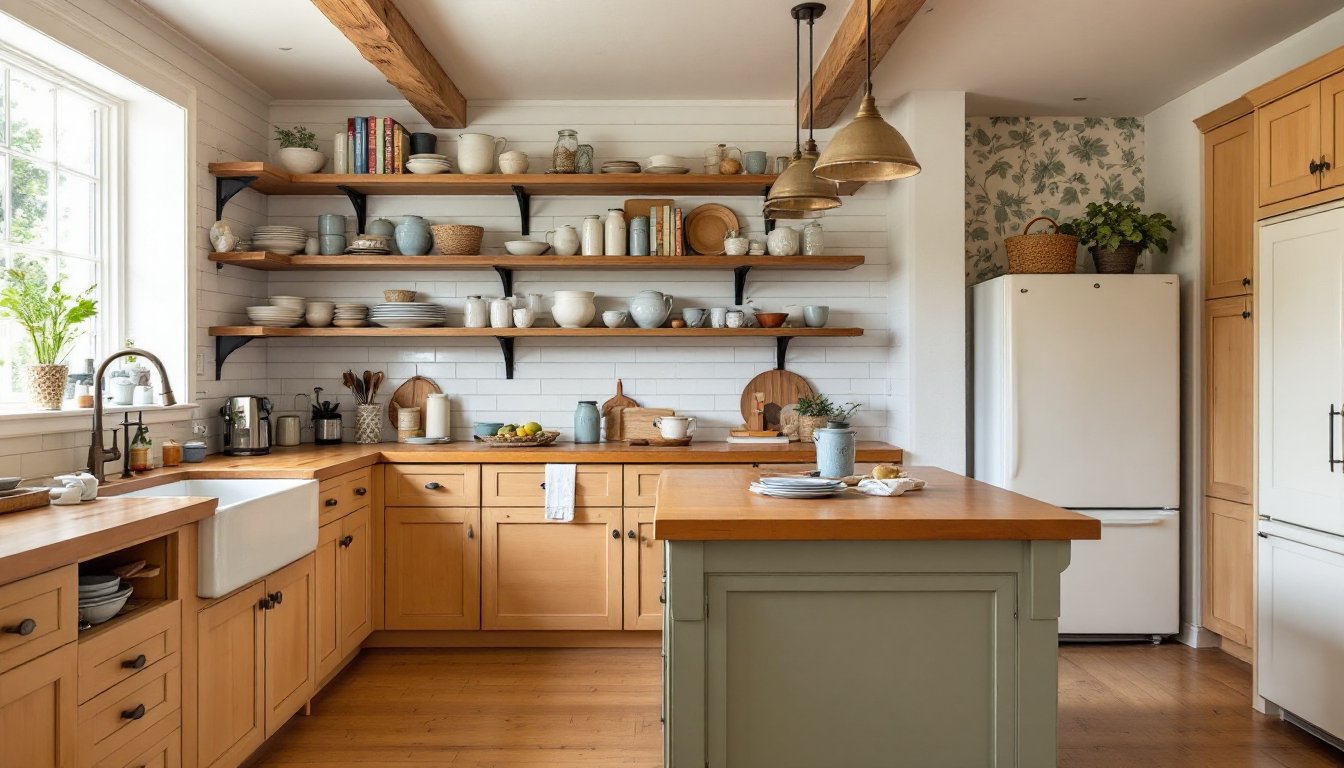
When planning an island, think of it as a three-sided storage system: two sides for drawers or cabinets, one side for seating. The seating side typically has knee space (30″ minimum) and a comfortable bar-height overhang (12″ to 15″), but the back and sides become dense, functional storage. This distribution keeps usable counter space clear while hiding clutter.
Design Styles and Finishes That Work Best
Your island’s style should echo your kitchen’s overall aesthetic without competing for visual attention, especially in a compact space.
Neutral and light finishes are safest in small kitchens. White, light gray, or natural wood islands reflect light and feel less imposing. A dark island (navy, black, or deep stain) can work if your kitchen has plenty of natural light and white cabinetry elsewhere, but it risks making a small space feel cave-like.
Butcher block and solid wood are practical and warm. They age gracefully, hide minor dings, and work in farmhouse, rustic, or transitional kitchens. Expect to maintain them: seal yearly, wipe spills promptly, and avoid letting standing water sit. They’re not for everyone, but homeowners who cook seriously often prefer the tactile, forgiving surface over stone or laminate.
Quartz and engineered stone tops are low-maintenance and durable. They resist stains, scratches, and heat (use trivets, though). Colors range from subtle to bold: light shades feel open, while patterned or darker surfaces add visual anchor in minimalist kitchens.
Laminate has improved dramatically. High-pressure laminates withstand daily wear and cost 30% to 50% less than stone. They’re not heat-resistant (use hot pads always), but they’re practical for a temporary or rental kitchen.
Base colors and materials matter equally. Stained plywood with simple butt joints reads budget-conscious. Framed cabinet panels with recessed centers look more intentional and period-appropriate. Soft-close drawers cost extra but feel professional and prevent slamming in apartments or homes with kids.
Wood species adds personality. Oak is classic and inexpensive: maple is refined: walnut or cherry are sophisticated but pricier. In a small space, consistency wins: match your island base to existing cabinetry or choose a complementary wood tone. Mismatched finishes make tight spaces feel disjointed, much like apartment decor tips suggest avoiding clashing materials.
Practical DIY Tips for Installation and Customization
Before you grab a saw, measure your kitchen’s electrical and plumbing layout. Many compact kitchens have outlets and water lines running through the center. You may need to reroute circuits or add a subpanel if your island includes a sink or cooktop. This isn’t a casual weekend project, hire a licensed electrician and plumber. Local codes vary, and mistakes are expensive (and dangerous).
For a sink-free island, you have more flexibility. Start with a sturdy base frame built from 2×4 lumber, leveled and secured to the floor with anchors or lag bolts. Use pocket-hole joinery (Kreg Jig) or traditional mortise-and-tenon for strength. A sloppy frame wobbles and feels amateur: invest in a level and take time here.
Top the frame with a substrate: 3/4″ plywood” works, but for longevity, use cabinet-grade birch plywood. Screw it down (not nailed) for ease of future adjustments. Sand the substrate smooth, then veneer, paint, or stain it. If using a tile or stone top, have a fabricator install it, misaligned grout or poorly sealed seams invite leaks and damage in this high-traffic zone.
Drawers and cabinets are the hardest part. Soft-close hardware adds $40 to $80 per drawer but feels solid. Standard drawer glides (bottom-mounted or side-mounted) run $15 to $30. Measure your opening exactly: even 1/4″ of error throws everything off. If cabinetry intimidates you, consider repurposing a used kitchen island base (search online marketplaces) and topping it with a new countertop. It’s cheaper and faster than building from scratch.
Seating and overhang require careful planning. Bar-height overhang (typically 12″ to 15″ beyond the base) supports standard bar stools (24″ to 26″ seat height). Measure the distance from the floor to your proposed top, 36″ is standard. Too low, and legs bump stools: too high, and the overhang looks precarious. Use 2×10 or laminated 2×12 for the overhang: it should feel rock-solid with no bounce when you sit.
Finishing and sealing determine longevity. If you’re staining wood, sand to 120-grit, apply pre-stain conditioner (softwoods benefit greatly), then two coats of stain. Seal with polyurethane (water-based dries faster and off-gasses less: oil-based is tougher but yellows). Three coats minimum on a high-traffic island top.
Finally, test fit everything before final installation. Roll your stools in, open drawers fully, and verify appliance access isn’t blocked. Small kitchens demand precision, sloppy work compounds in tight spaces, and a poorly fitting island wastes materials and frustration. Take your time, consult design resources for inspiration, and don’t hesitate to hire professionals for electrical, plumbing, or finishing if you’re uncertain.