Designing your own bathroom doesn’t require hiring an expensive designer or signing up for a major renovation. With careful planning, honest assessment, and a clear vision, homeowners can create a functional, beautiful space that reflects their style and fits their budget. Whether you’re working with a cramped half-bath or a sprawling master suite, the key is breaking the project into manageable steps: understanding your constraints, choosing materials that work for your lifestyle, and making informed decisions about layout and fixtures. This guide walks you through the entire process, from measuring your space to selecting finishes, so you can design a bathroom that actually works for you.
Table of Contents
ToggleKey Takeaways
- Design your own bathroom by first measuring your space, noting permanent features, and sketching a floor plan to work within your constraints rather than against them.
- Set a realistic budget early—modest refreshes run $3,000–$8,000, mid-range remodels $10,000–$20,000, and full renovations exceed $50,000, plus 10–15% contingency for unexpected issues.
- Choose a cohesive design style and color palette, avoiding trendy hues that fade in appeal; soft, muted colors are more forgiving than saturated tones.
- Optimize your layout by positioning the toilet away from the entry, placing anchor fixtures (toilet, vanity, shower) according to building codes, and considering space-saving options like pocket doors and wall-mounted vanities.
- Select durable, low-maintenance materials like porcelain tile and quartz countertops that balance cost, aesthetics, and long-term performance in your bathroom design.
- Install proper task lighting above and beside mirrors (75–100 lumens per square foot) and a correctly-sized exhaust fan with exterior ducting to prevent mold and moisture damage.
Assess Your Space and Set a Realistic Budget
Start with your existing footprint. Measure your bathroom in feet and inches, both length and width, and note any permanent features like plumbing stacks, windows, or load-bearing walls. These aren’t always movable, and relocating them costs significantly more than working within them. Sketch a rough floor plan using graph paper or a free tool like Homedit provides design inspiration for layout ideas.
Budget matters early. A modest bathroom refresh (new paint, hardware, fixtures) runs $3,000–$8,000. A mid-range remodel (new vanity, tile, lighting) lands around $10,000–$20,000. A full gut-and-rebuild can exceed $50,000, depending on your region and material choices. Decide which bucket you’re in before you fall in love with marble countertops. Include a 10–15% contingency for the unexpected (always present in bathrooms: hidden mold, plumbing surprises, structural issues). If your project involves moving plumbing, structural changes, or electrical work beyond simple fixture swap-outs, factor in permits and licensed contractors, don’t skip this to save money upfront.
Choose Your Design Style and Color Palette
Your bathroom’s style sets the tone for every other decision. Modern minimalist? Farmhouse? Spa-like retreat? Pick a direction and stick with it: mixing too many aesthetics feels chaotic in a small space. Gather inspiration from photos, magazines, or design sites, but be honest about whether those images match your maintenance tolerance and lifestyle.
Color psychology matters in bathrooms. Whites and soft grays feel clean and spacious: they also hide water spots less than dark colors. Warm neutrals (taupe, warm gray, soft beige) feel welcoming. Bold accent colors (navy, emerald, terracotta) work on one wall or in tile, but risks aging your design faster than you’d like. Consider that tiles, paint, and fixtures live in your bathroom for years: trendy colors fade in appeal. Lighting also shifts how color reads, so visit a showroom or paint large swatches on your wall and observe them at different times of day. Soft, muted palettes are forgiving: saturated hues require more confidence and commitment.
Plan Your Layout and Fixtures
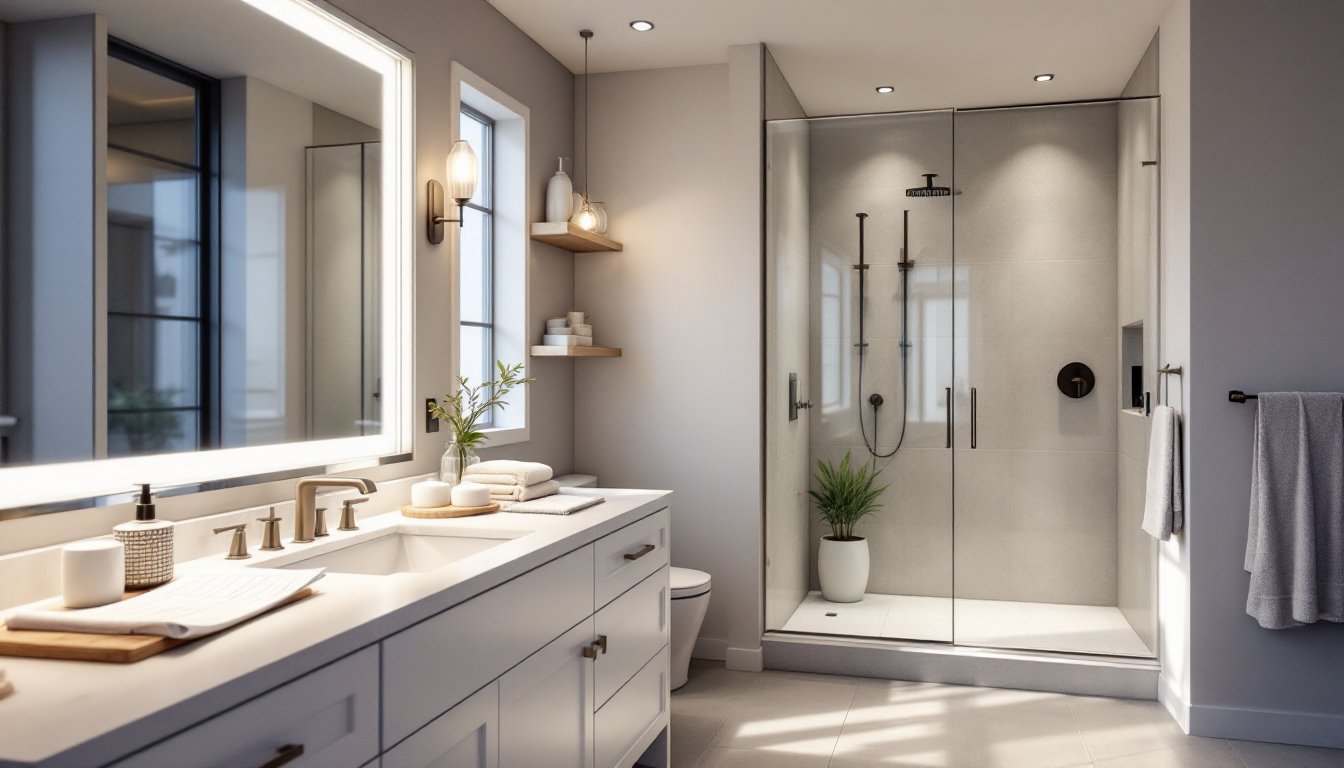
Layout determines flow and function. The toilet, vanity, and shower are your three anchor points. Standard building codes (which vary by jurisdiction, so check yours) require a minimum clearance of 15 inches from the center of the toilet to any wall or fixture. The vanity should sit at least 21 inches from the toilet. A shower or tub needs adequate clearance for entry and exit, typically 36 inches minimum width, though 48 inches is more comfortable.
Optimize Fixture Placement
Place your toilet away from the entry door if possible: it’s the first thing visitors see. Tubs go against a wall with plumbing access: if relocating the tub, budget extra labor and materials. Vanities can be single or double: double vanities suit shared bathrooms but eat floor space fast. Pedestal sinks save space but offer no storage, a trade-off worth considering. Corner vanities maximize unused space. Wall-mounted vanities (above a 12–15 inch toe-kick) open up the floor and ease cleaning. Pocket doors or sliding barn doors work better than swing doors in tight bathrooms: a standard door swing needs 24–36 inches of clearance, which many small bathrooms lack. Sketch your layout with actual fixture dimensions, not estimates. Most fixtures have spec sheets available online or at showrooms.
Select Materials and Finishes
Materials dictate durability, maintenance, and cost. Tile is the workhorse of bathrooms: it’s water-resistant, easy to clean, and durable. Ceramic and porcelain are most common: porcelain is denser and slightly more durable but costs more. Larger tiles (12×24 or bigger) look modern and require fewer grout lines (which can harbor mold). Smaller tiles (2×2, subway tile) feel traditional but demand more grout maintenance. Budget for quality grout sealer and recaulk, many DIYers skip this and regret it.
Countertops in bathrooms see moderate water exposure. Laminate is cheap but isn’t water-resistant long-term: water seeping through edges degrades it fast. Solid surface (like Corian) is mid-range, durable, and repairable. Natural stone (granite, marble) looks stunning but requires sealing and is vulnerable to etching from acidic cleaners. Quartz is engineered, non-porous, low-maintenance, and costs more upfront but lasts decades. Vanities come in wood, metal, or composite: wood looks warm but requires finish maintenance and humidity resistance. Mirrors, lighting, and hardware add personality, brushed nickel and matte black are safe: gold and chrome date more quickly. Paint: use bathroom-grade semi-gloss or satin finish (not flat) to handle humidity. Modern home design resources showcase how materials age and perform in real homes.
Design Lighting and Ventilation
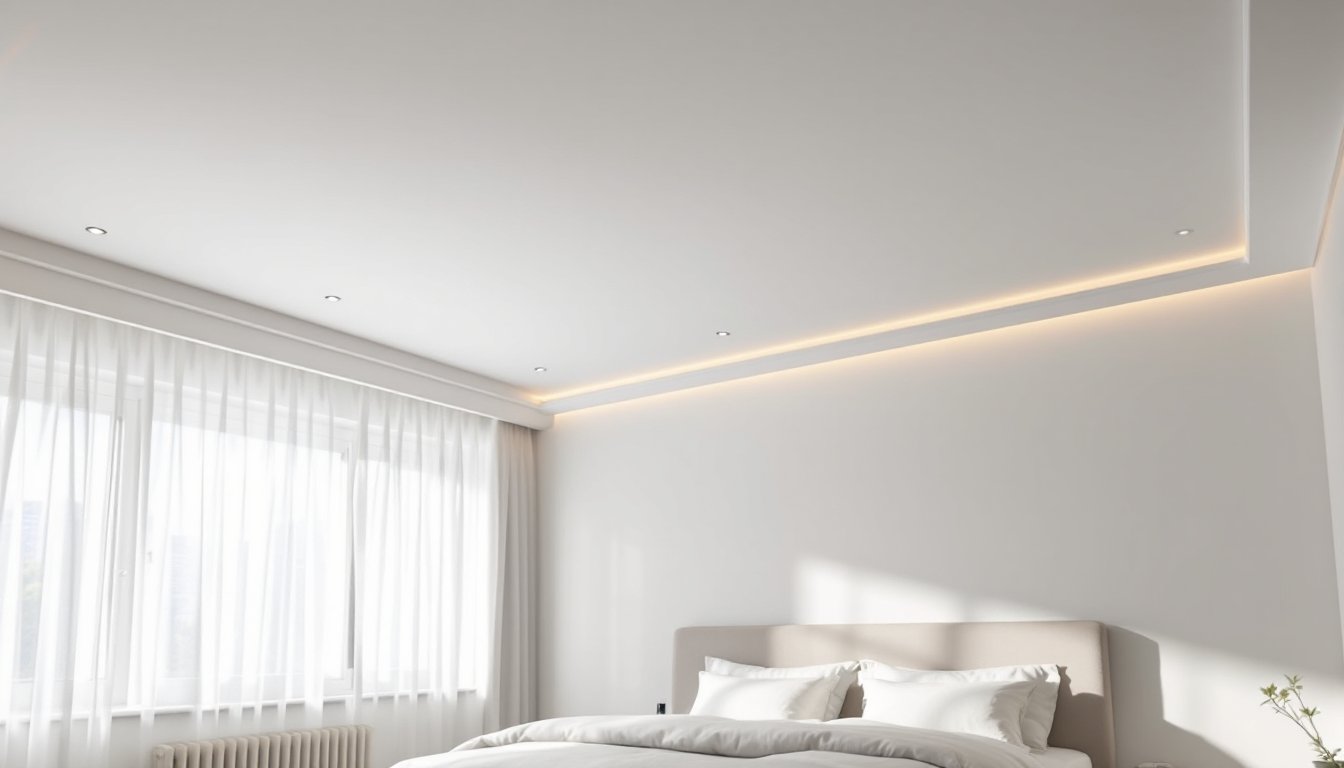
Lighting in bathrooms serves two jobs: task and mood. Task lighting (above and beside the mirror) needs to be bright and shadow-free for shaving, makeup, or grooming: aim for 75–100 lumens per square foot. Vanity fixtures with multiple bulbs or a well-lit LED mirror work best. Overhead ceiling lights can be harsh: use them as ambient support, not primary task light. Layering, task light, ambient overhead, and a dimmer switch, gives flexibility.
Ventilation is non-negotiable for moisture control. Most building codes require a bathroom exhaust fan rated for your room size (measure in square feet and check the fan’s CFM, cubic feet per minute rating). A 5×8 bathroom typically needs 50–80 CFM: larger rooms need more. Install the fan with a damper (prevents backdrafting) and duct it to the exterior, not the attic, which traps moisture. Run the fan for 20–30 minutes after showers to clear humidity. A poorly vented bathroom develops mold, peeling paint, and deteriorating grout faster than you’d expect. If your current exhaust fan is undersized, upgrade it during your remodel. Humidity sensors or timers (set to 30 minutes post-use) are inexpensive upgrades that reduce running time and energy use.
Add Storage and Organizational Features
Storage separates a functional bathroom from a cluttered one. Medicine cabinets mounted above or beside the sink hold daily essentials. Recessed cabinets (built into the wall) save floor space but require framing access: surface-mounted cabinets are simpler and cheaper. Open shelving looks modern but requires constant tidying: closed cabinets hide clutter. Floating shelves work if secured to studs (not just drywall): they demand honest weight-bearing limits. Under-vanity storage with pullout drawers beats a sink cabinet with a plumbing mess to work around, measure your plumbing carefully before committing to drawer placement.
Towel racks, hooks, and corner caddies are functional decor. Heated towel racks add luxury and cost $100–$400 depending on size and hardwired vs. plug-in installation. A linen closet or wall cabinet keeps extra towels, toiletries, and cleaning supplies accessible. Caddies or corner shelves in the shower contain bottles and soaps without eating floor space. Drawer organizers and bins keep small items sorted. Comprehensive bathroom design guides offer storage solutions for various layouts. Overplanning storage now prevents the “where do I put this?” scramble later.